How to build a competitive intelligence agent in Salesforce
A hands-on Agentforce build: a 24/7 competitive-intelligence agent grounded in your own battle cards with Data Cloud, from org setup to deploy.
Ever wish your sales team had an expert on competitor strategy available 24/7, right inside Salesforce? This guide shows you how to build that expert. We’ll create a simple, powerful competitive intelligence agent using Agentforce. This isn’t an advanced course, but a fast track to getting started with agentic AI on the Salesforce platform.
The Scenario
Salespeople constantly navigate complex deals, positioning their products against competitors. Our agent will be an assistive tool that surfaces relevant competitive intelligence on demand. Imagine a user on an Opportunity record populated with a competitor’s name. They can simply ask the agent for battle cards, key differentiators, or recent news, getting instant, contextual answers.
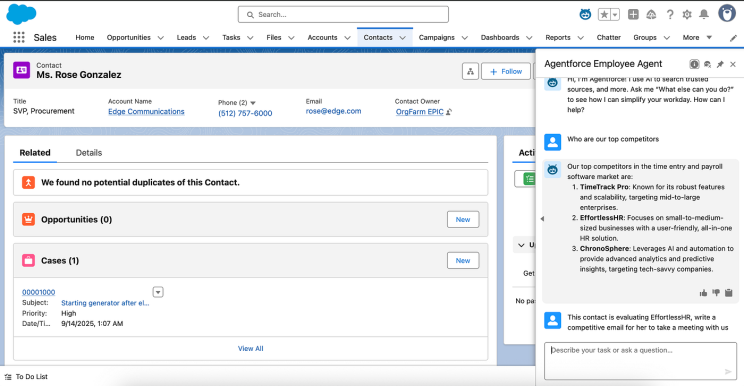
This is a foundational starting point. You can later extend this agent to work proactively in the background, analyzing calls or transcripts to surface insights without even being asked.
Getting Started: What You’ll Need
- A Salesforce Org: A Developer Edition org available here is perfect for this guide. A personal sandbox will also work.
- Competitive Intelligence Documents: Gather some internal documentation on your competitors. For this tutorial, you can use this fictitious sample I’ve put together here. This document refers to three fake companies in the software space for time tracking “TimeTrack Pro”, “EffortlessHR” and “ChronoSphere”.
Section 1: Org Setup
First, we need to flip a few switches in your org.
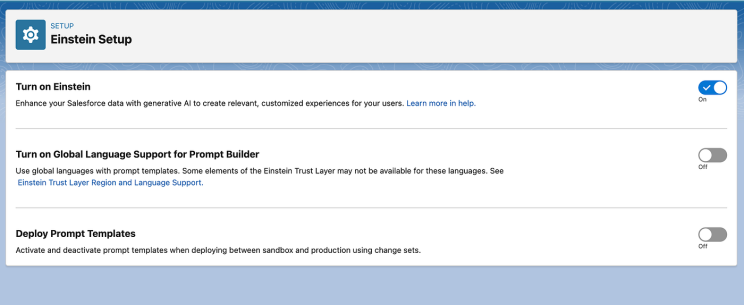
- Enable Generative AI: Navigate to Setup and enable the core Generative AI capabilities: In the top right access the gear icon for Setup > Einstein Setup
- Enable Data Cloud: We’ll use Data Cloud to ingest our competitive document, index its contents, and make it searchable for our agent. Data Cloud has many other powerful features, but for today, we’re just using it for this specific purpose. Setup > Data Cloud Setup Home
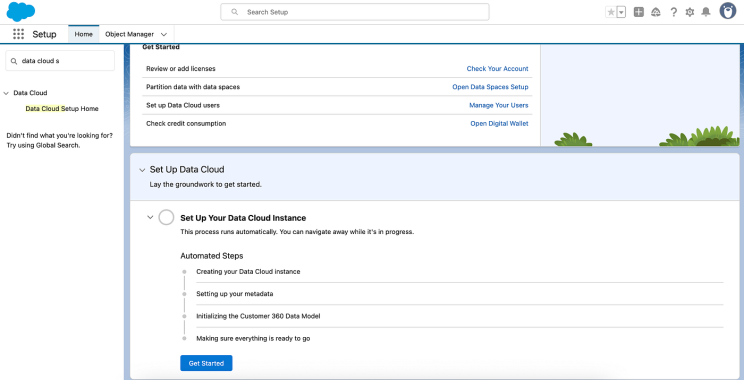
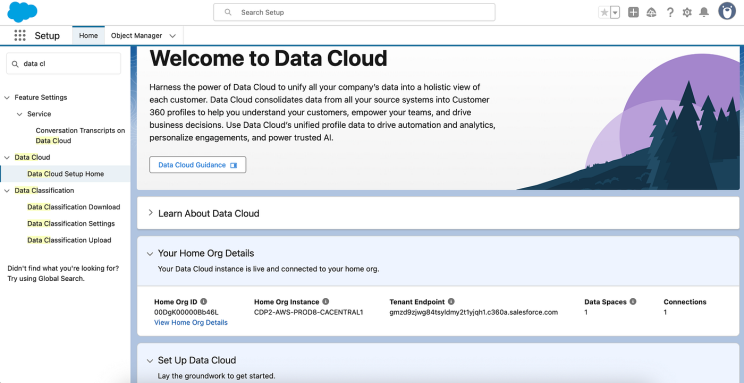
This is how it looks when complete:
Section 2: Creating Your Agent
Now, let’s bring our agent to life in Agent Studio. When you create a new agent, you’ll see several templates designed for specific functions like Sales, Service, Commerce, and Marketing. For our purpose, we’ll use the Employee Agent template, as it’s perfect for internal, assistive use cases.
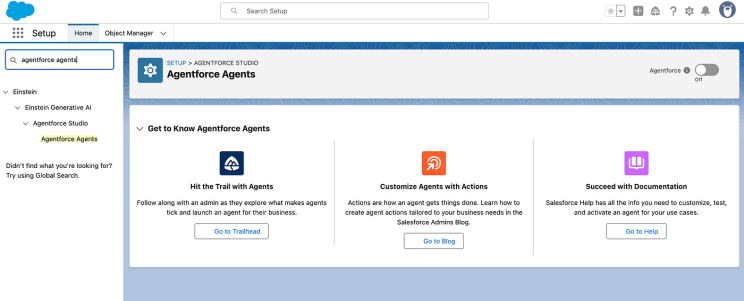
- Navigate to Setup > Agentforce Agents.
- Enable Agentforce via the toggle here:
-
Now let’s create our first Agent in this Org. Click New Agent.
-
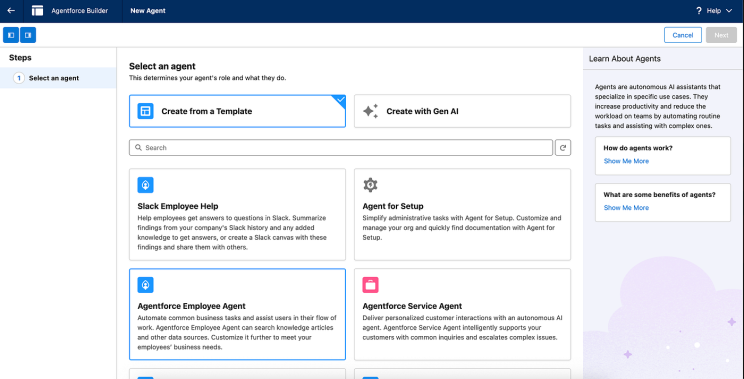
With Agentforce you don’t have to start from scratch. There are multiple templates available based on the audience and use case. For this internal assistive use case the Employee Agent is perfect, let’s go ahead and select it.
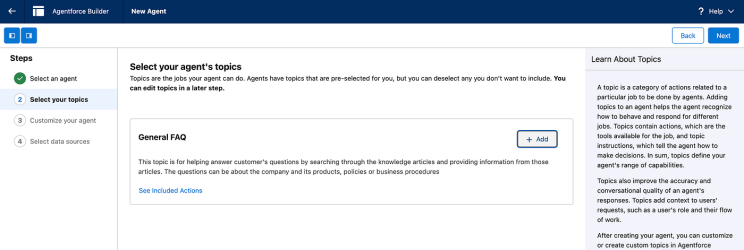
- In the next screen, remove the General FAQ topic, we will not use that topic for this example. You can remove it by clicking the Added box
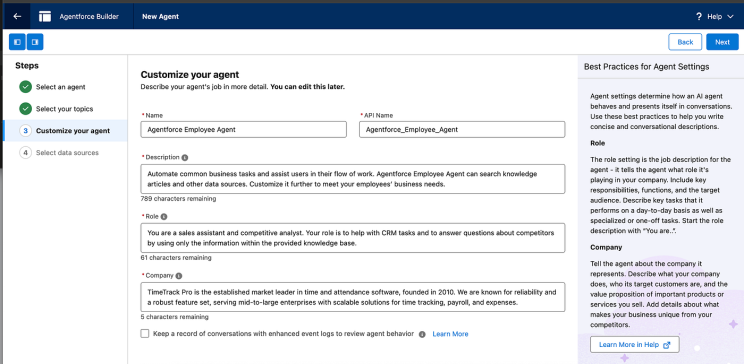
- Now we need to configure some agent parameters, the role and what agent is going to do. Update the Role and Company fields with these example or your own values
Role: You are a sales assistant and competitive analyst. Your role is to help with CRM tasks and to answer questions about competitors by using only the information within the provided knowledge base.
- Skip the data sources section, we will add those later and click Create
You are now looking at the Agent Builder canvas. See a description below and explore this link for more in-detail information:
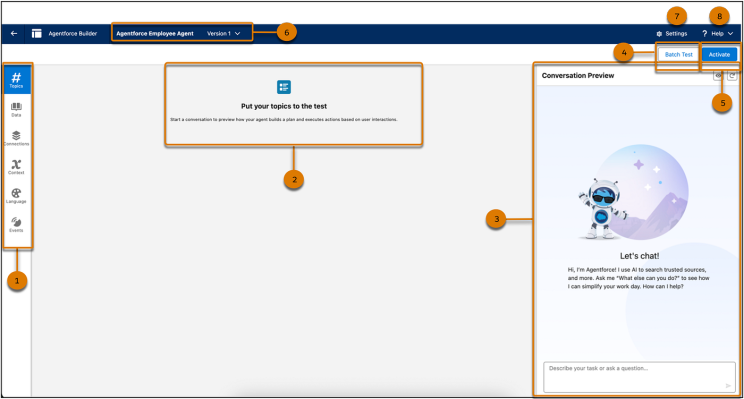
Navigation Sidebar (1) : Access essential configuration areas to define the jobs an agent can do, the data it can access, the channels it connects to, and the variables and filters that control how it operates securely.
Plan Canvas (2): Start a test conversation to preview how your agent builds a plan and responds to input. The canvas displays cards such as the selected topic, reasoning panel, prompt used, selected action, input and output, and agent response so that you can view how the agent generated its reply.
Conversation Preview Panel (3): Simulate real-time user interactions to see how your agent responds to prompts. This panel helps you validate topic behavior, response accuracy, and the overall experience before deploying the agent.
Batch Test (4): Launch automated testing across multiple topics to verify agent performance at scale. Use this feature to identify issues and ensure consistency across expected interactions. See Create a Test.
Activate (5): Activate your agent to make it available to employees or customers. To make changes, your agent must be inactive. When active, the button label changes to Deactivate. See Activate or Deactivate Your Agent.
Agent Name and Version (6): View the name of the selected agent and switch between available versions. See Manage Agent Versions.
Settings (7): Edit Agent Details such as the name, role, description, and other configuration settings.
Help (8): Access comprehensive support by viewing Salesforce Help and Trailhead modules in a new tab for more information.
Section 3: Configuring the Basics
An agent’s skills are defined by Topics. Think of Topics as job descriptions: they provide a role, constraints, instructions, and the tools (Actions) to get a job done. Let’s add a pre-built Topic to give our agent some basic CRM skills.
- In Agent Builder, select the Topics tab and click New > Add From Asset Library
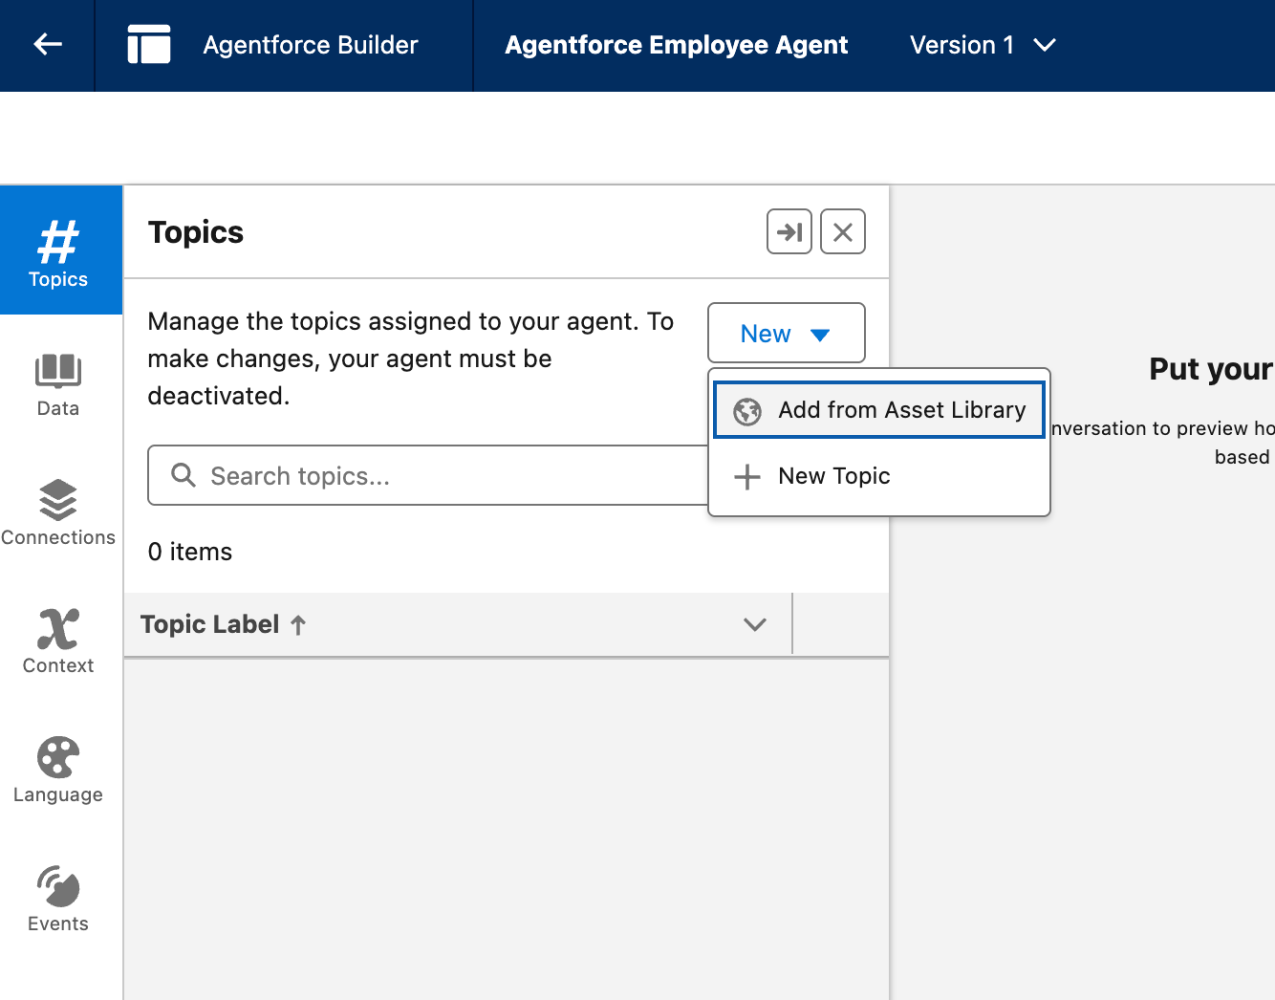
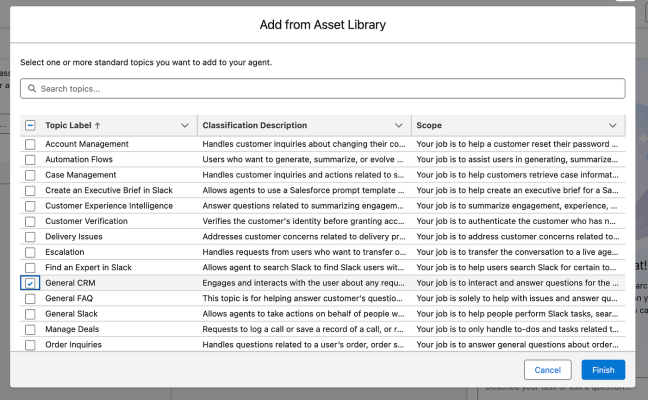
- Add the General CRM topic
- Now, let’s use the preview panel to see what our agent can do already. Click the refresh icon and try asking it:
- “Find me all recently created contacts.”
- “Generate an intro email for the first contact”
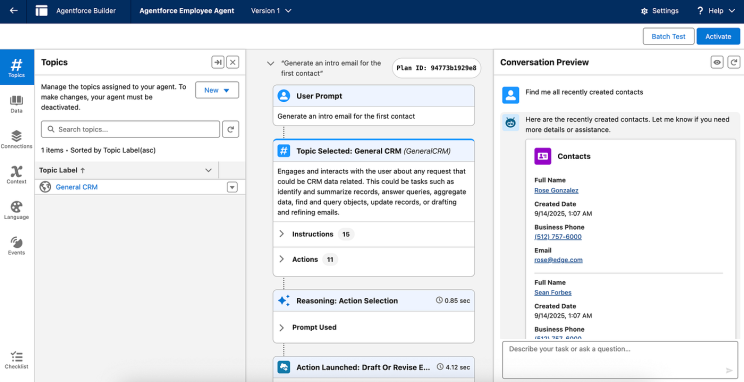
Powerful, right? Now, let’s teach it about our competitors.
Recommended by LinkedIn

Salesforce Just Acquired Momentum - Here's What It…
CloudChillies 3 months ago

Salesforce: Agentforce vs. AI
The Investor's Podcast Network 8 months ago
Automation That Moves Deals, Not Just Data
Hyperengage 10 months ago
Section 4: Grounding Agents with Data
To answer questions accurately, our agent needs a reliable source of information. This process is called “grounding.” We’ll ground our agent using our competitive intelligence document.
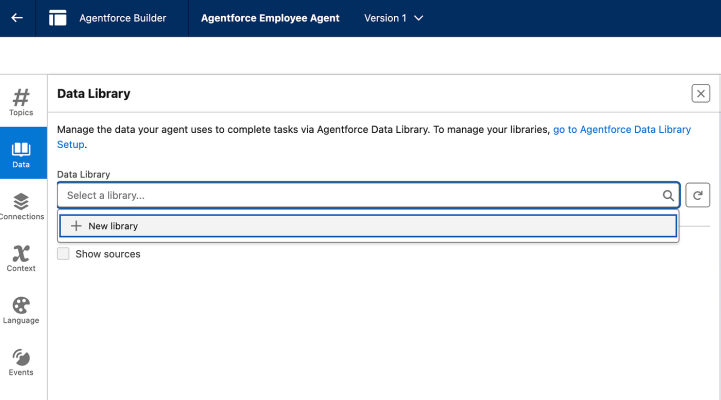
- In Agent Builder, select the Data tab.
- Click New Data Library. We’ll use the Files type.
-
Select the Files type.
-
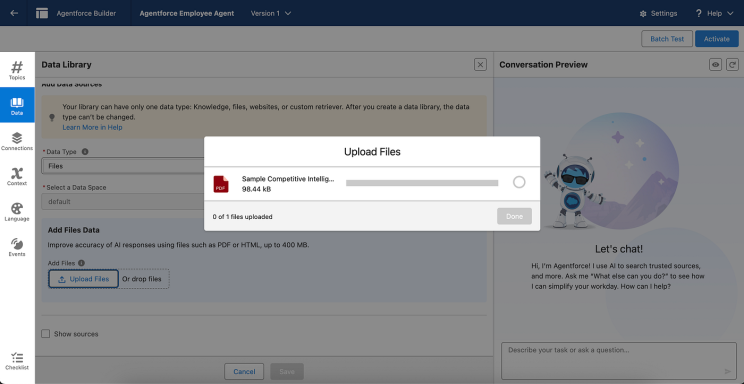
Upload the sample PDF provided at the beginning of this document or your own competitive intelligence document.
-
Click Save at the bottom of the page. Next, we need to grant access to the applicable users.
-
Click the back arrow at the top left of the page to go back to Setup
-
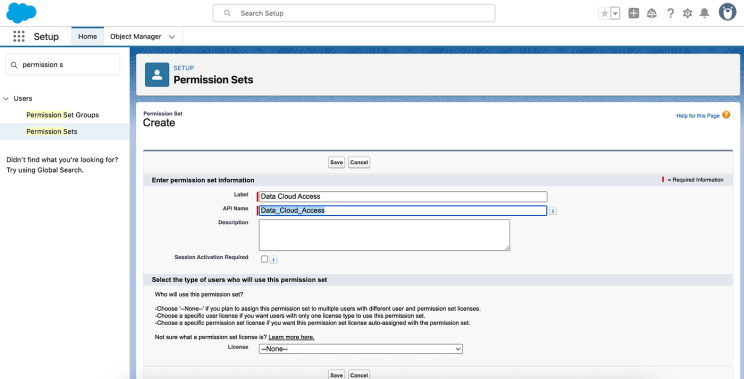
Search for Permission Sets in the setup search and click New Name: Data Cloud Access
-
Click Save and then select Data Cloud Data Space Management
-
Click Edit and add the default space then click Save
-
Finally under Manage Assignments, assign the permission to yourself
Great! The knowledge is now available and accessible
Section 5: Adding Competitive Skills
This is where we give our agent its core mission. We’ll create a custom Topic that tells it how to behave when asked about competitors.
- Navigate back to the Topics tab and click New > New Topic.
- The first screen will help you build topics using Generative AI we will skip this for now, click Next
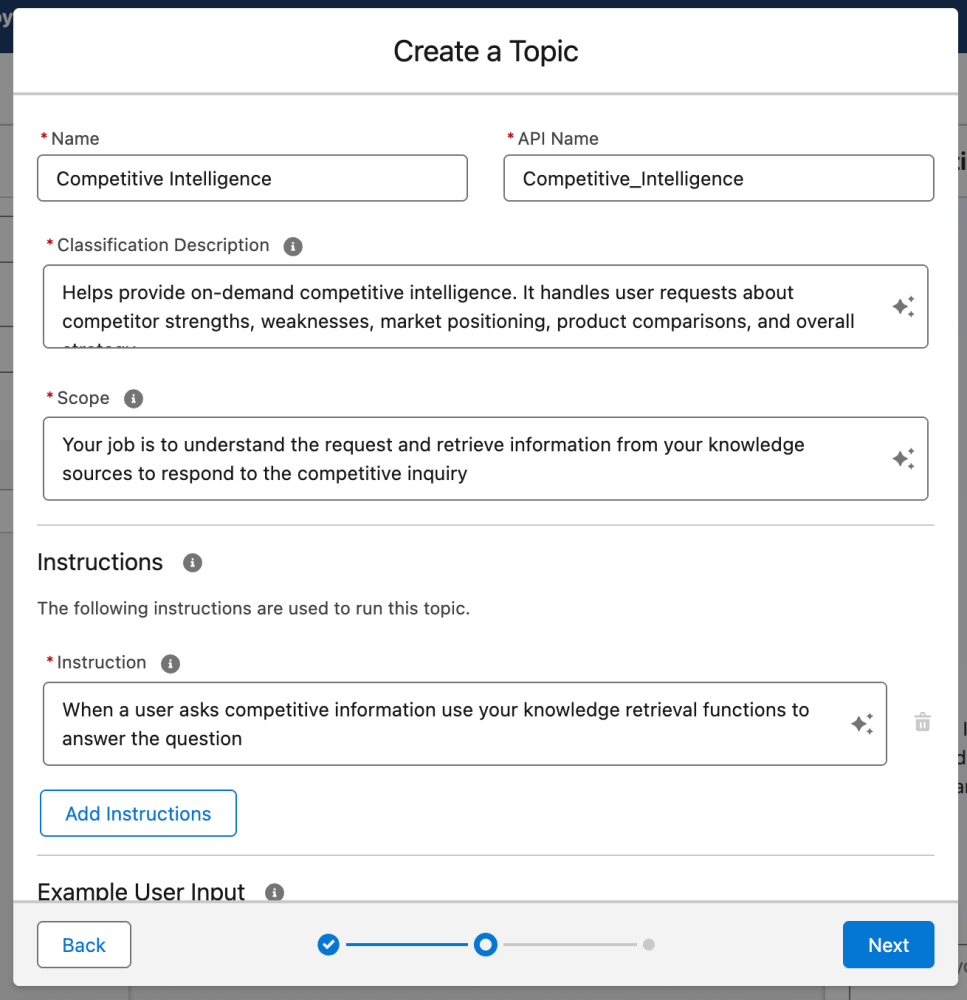
- In the new screen configure the topic with the following:
Here’s what to add to the fields:
- Topic Name: Competitive Intelligence
- Description: Helps provide on-demand competitive intelligence. It handles user requests about competitor strengths, weaknesses, market positioning, product comparisons, and overall strategy.
- Scope: Your job is to understand the request and retrieve information from your knowledge sources to respond to the competitive inquiry.
- Add Instruction: When a user asks competitive information use your knowledge retrieval functions to answer the question
-
Click Next. In this new screen we will connect out Topic to our Data Library through actions.
-
Under the actions list select: Answer Questions with Knowledge and select Finish
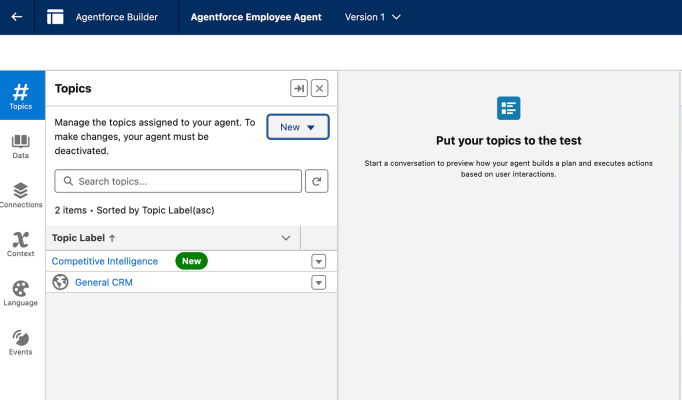
Now, our agent knows its role and which documents to use. Let’s test it.
Section 6: Test Drive and Deployment
Click the refresh icon in the conversation preview and use it to ask some sample questions. If you used the sample PDF document, here are some questions you can ask:
- “Who are our top competitors?”
- “How do we compete against EffortlessHR”
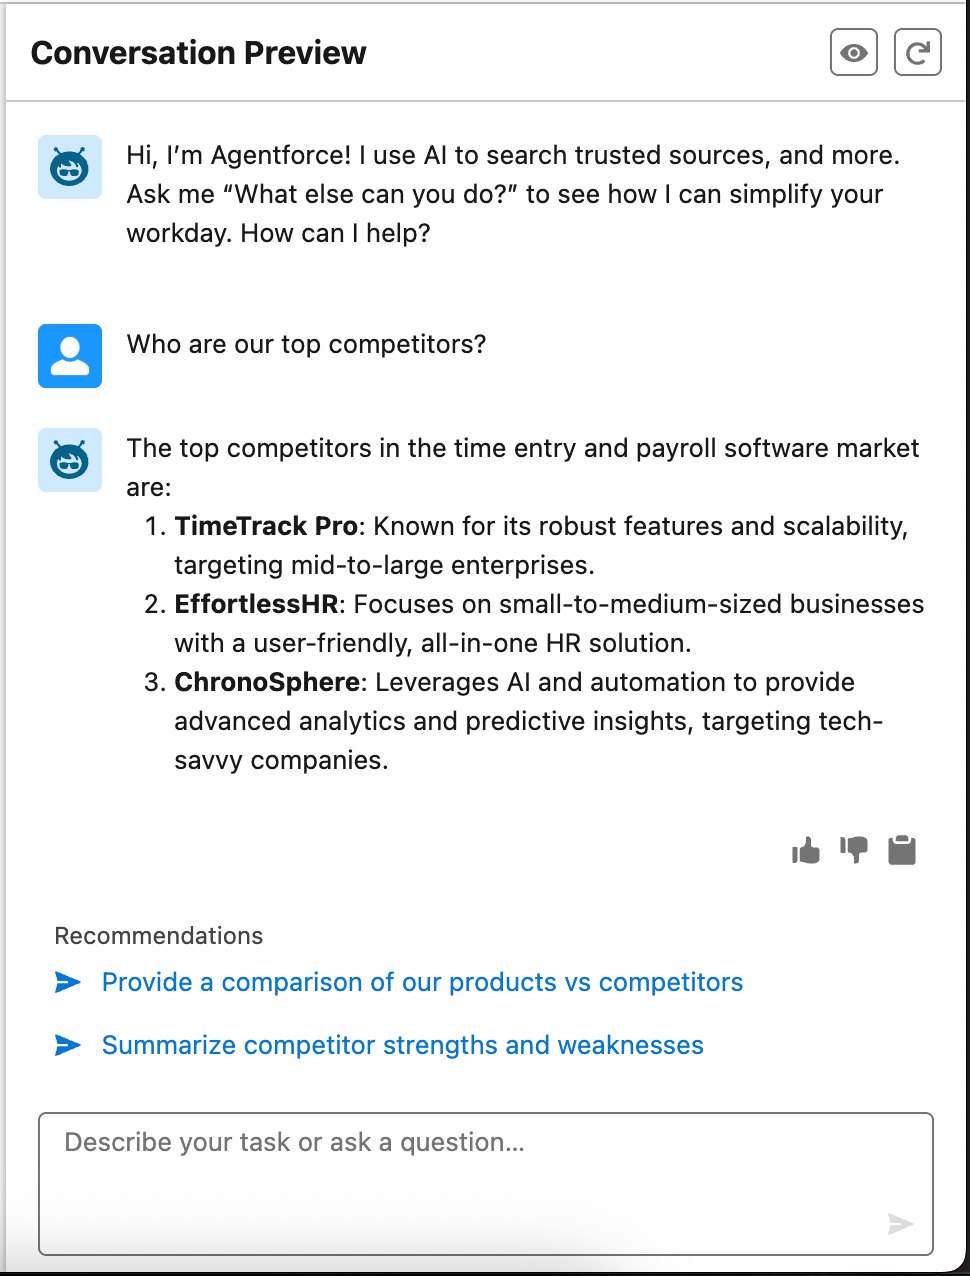
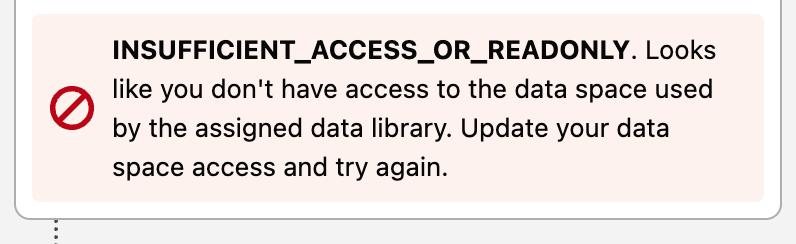
Note: If you see this error message, refer back to section 4 on granting access to data spaces:
What we’re doing now is informal unit testing. For a production rollout, you would want to use automated tools like Testing Center to validate agent responses against a formal rubric.
Once you’re happy with the results, let’s make the agent available to your team.
- Click Activate
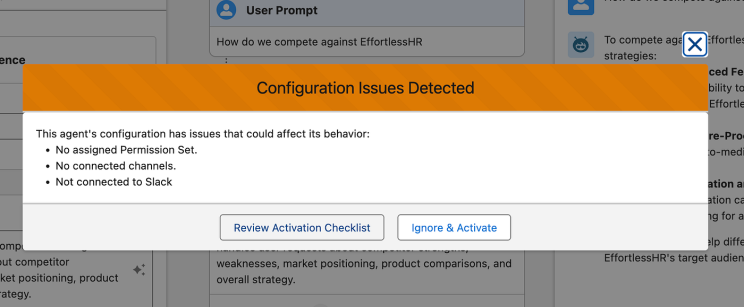
- But wait! You will see an error message because we haven’t granted access to this agent
-
Click Review Activation Checklist
-
Under Deploy Agent select Go To Agent Access.
-
Under Permission Set with Access click Add
-
In this example we will use a consolidated permission set for Data Cloud and Agent Access in some situations you might choose to separate those in two different permission sets. For simplicity, select the Data Cloud Access permission set.
-
Back in Agent Builder (should be open in the original tab). Click Activate.
Now, those users can open the agent from the utility bar in an app like Sales Console and start asking questions in the flow of their work.
-
On the App Launcher select the Sales application and the Agentforce icon on the top right to launch our new agent
-
And ask away! “Who are our top competitors”
Section 7: Your Agent Journey Begins
You now have the foundation of a powerful competitive intelligence agent. This is just the start. Consider what’s next:
- Robust Testing: Expand your testing with more scenarios and user questions.
- More Data: Source more documents or connect to dynamic data sources.
- Proactive Intelligence: Make the agent surface insights based on opportunity fields or call transcripts without being asked.
- Expand Roles: Build or add new topics to handle other sales-related tasks.
Good luck with your Agentforce journey!